Page 3 of 70
Re: My '44 Flying Control Dodge
Posted: Sat Oct 09, 2010 6:16 pm
by armyairforce
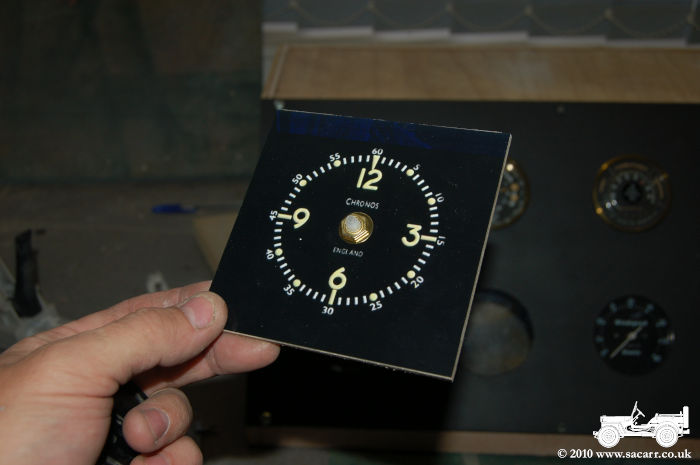
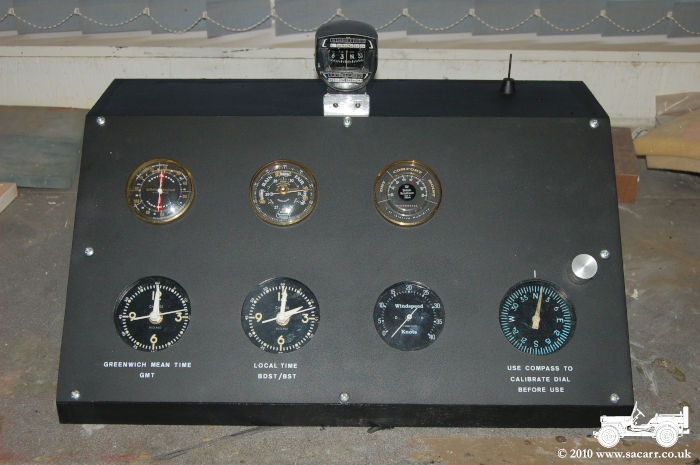
Today, the wind speed gauge was fitted, and then the two clock faces were fitted to ply plates and the clock mechanisms fitted. The pointers needed trimming down and respraying. A wooden framework was then built on the inside of the panel to hold the instruments behind the removable aluminium front face.
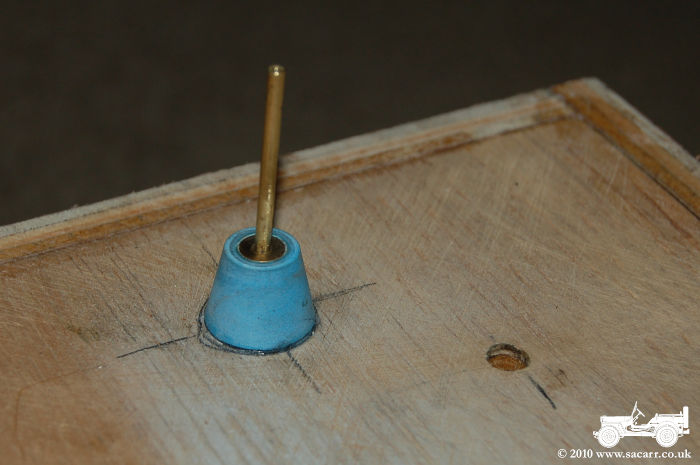
After the Wind Speed gauge was fitted, the drive cable was routed to exit the top of the panel. A piece of brass tube was crimped and soldered to the square drive of the cable so that a drive wire could then be connected up to the truck roof and the yet to be built anemometer head.
Re: My '44 Flying Control Dodge
Posted: Sat Oct 09, 2010 6:16 pm
by armyairforce
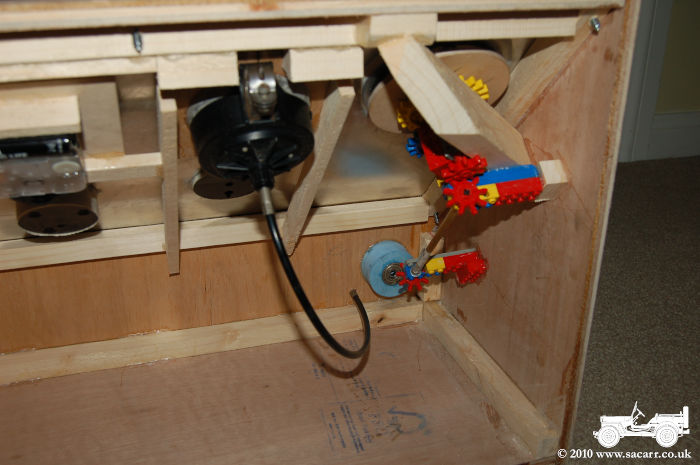
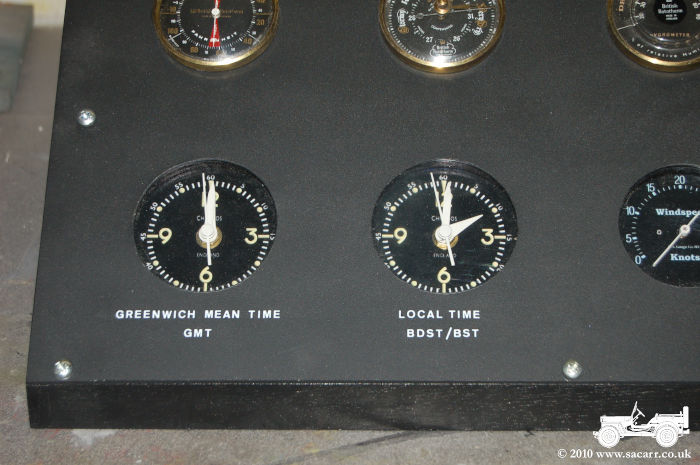
The first picture below shows the inside of the panel with the wind direction mechanism and wind speed gauges in the foreground. To the left is one of the clocks and below and behind, the barometer and hygrometer.
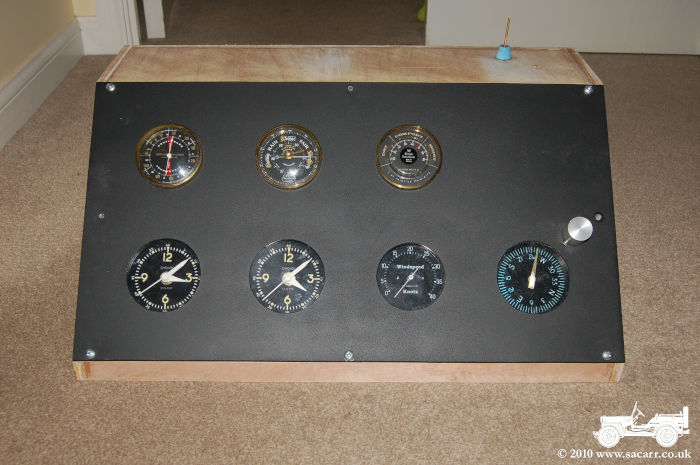
This picture shows the virtually complete instrument panel, just needing the box painting and then fitting into the truck.
Re: My '44 Flying Control Dodge
Posted: Sun Oct 10, 2010 12:36 pm
by armyairforce
Finished! The main box of the meteorological station was primed last night and painted this morning. The aircraft compass has been mounted on the top. This is used to calibrate the wind direction indicator once the truck parks up on the end of the runway.
Also done today is the stencilling on the clocks and the wind direction indicator. The only thing that may be added in the future is a toggle switch in the blank upper right side of the panel to switch on a panel light which I have and that can be mounted overhead.
I knew there was a US/UK time difference during WW2, hence the reason for the two clocks, but just read today that all orders from 'Pinetree' were written using GMT. The UK however was using British Double Summer Time ( BDST ) during the summer. So one clock is set to GMT and the other adjusted from BST to BDST as necessary.
Re: My '44 Flying Control Dodge
Posted: Sun Oct 10, 2010 2:37 pm
by FrasseP
Awesome armyairforce

Re: My '44 Flying Control Dodge
Posted: Sun Oct 10, 2010 3:03 pm
by armyairforce
Cheers! I'm just compiling a video showing all it's bits working. With the Pickering War Weekend next weekend, it's going to be a couple of weeks before I can get it fitted into the truck. Video to follow shortly.
Re: My '44 Flying Control Dodge
Posted: Sun Oct 10, 2010 3:39 pm
by armyairforce
Re: My '44 Flying Control Dodge
Posted: Sun Oct 10, 2010 7:03 pm
by Phil P
Hi Steve that is awesome. I have always wanted to restore or make a piece of kit to go with one of my trucks. The nearest I have got was French polishing the mattock and shovel handles for my WC51 and painting the shovel in gloss black and then polishing it to a mirror finish, but that just pales at the side of your instrument panel. Also I am sad but that... brilliant.
You da' man!
Phil
Re: My '44 Flying Control Dodge
Posted: Sun Oct 10, 2010 7:10 pm
by armyairforce
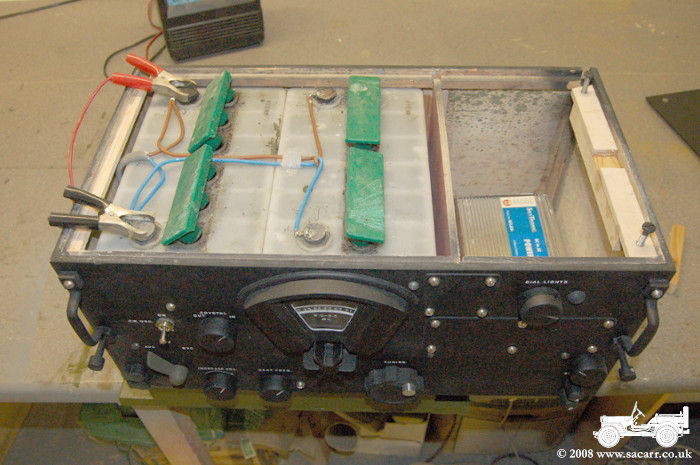
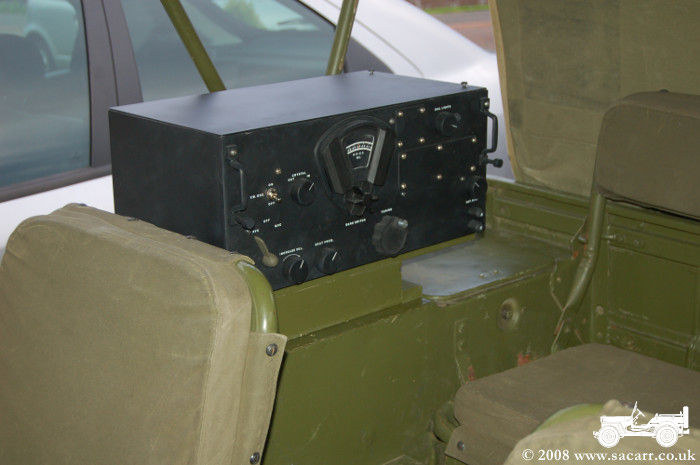
Thanks. It's not the first bit of fakery I've made. A couple of years ago, I made this dummy BC-348 radio for my Jeep to hide 12v batteries, an amplifier and MP3 player.
Re: My '44 Flying Control Dodge
Posted: Mon Oct 11, 2010 10:57 pm
by armyairforce
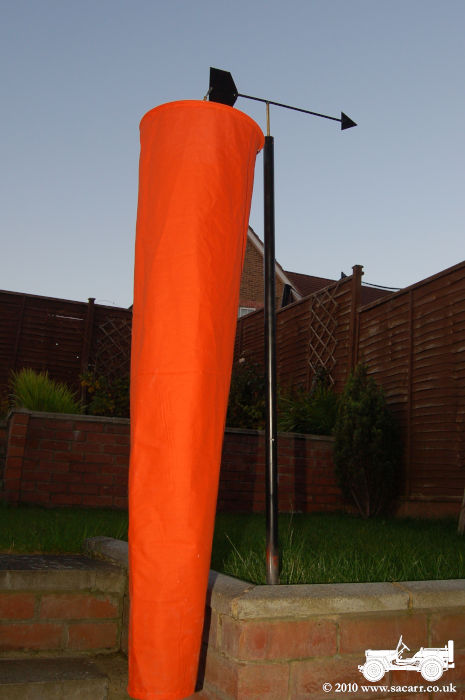
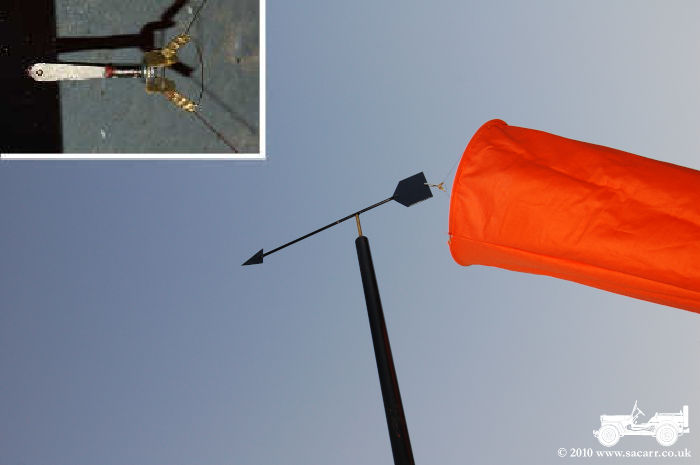
A cotton windsock has now been made and is now ready to be connected to the weather vane.

Re: My '44 Flying Control Dodge
Posted: Tue Oct 12, 2010 7:44 am
by Frankie
Do I see that correctly in you're picture....
Is one of the gauges working on....LEGO???
On hell of a toy that stuff! If they didn't invented that

Looking very cool btw! Youre really making something special out of it!
regards
Frank
Re: My '44 Flying Control Dodge
Posted: Tue Oct 12, 2010 8:01 am
by armyairforce
Yes, the gearing is old style technical Lego. I've had the stuff kicking around in a box for years thinking it will be useful one day, and it was. Since it isn't seen inside the panel, there was no point spending money buying brass of nylon gears for the job.
The gearing works the wind direction indicator driven by the weather vane. This coming weekend is the War Weekend on the North Yorkshire Moors Railway, so it will be the following weekend before I can get the truck and fit the panel. In the mean time, I can possibly make a start on the anemometer head. That needs to be positioned out of the way of the windsock, which means a long pianowire drive from the panel, through gears and across the roof of the truck. Since these gears are most likely going to be seen, they will have to be nicer looking than the Lego.
Re: My '44 Flying Control Dodge
Posted: Tue Oct 12, 2010 10:07 am
by Phil P
Hi Steve.
I find a really good source of gears and mini tooth belt drives are 'dead' printers. I used to collect all the broken printers and plotters from where I worked and strip them. I ended up with a compartmented tool box with the gears split into various pitches and tooth sizes. There are 12V motors and micro switches in there as well. The drives are silent. Old video recorders are also a good source. Most of the gears are mounted on sub plates as a train of gears. I made a turntable for my model railway using the tape head for the centre pivot because it has no free play and then a collection of printer and video recorder drive gears and motor. It does 2 RPM in silence. It makes a pleasant change from playing with heavier things.
Phil
Re: My '44 Flying Control Dodge
Posted: Tue Oct 12, 2010 4:45 pm
by armyairforce
I'm also a model railroader!
This is Storage Depot 41, Kingman, AZ.

Re: My '44 Flying Control Dodge
Posted: Tue Oct 12, 2010 5:17 pm
by armyairforce
Made the swivel linkage for the wind sock when I got in from work. The sock is detachable from the vane using a small metal M3 clevis.
Re: My '44 Flying Control Dodge
Posted: Wed Oct 13, 2010 8:17 am
by Phil P
Hi Steve.
My railway is WD 1943/45. So I've got 4 -8F's a scratch built S160 and a couple of US Army switchers. Plus a few LMS loco's. Not forgetting 2 WC52's and 3 US Navy j**ps in grey. Obviously poor map reading! When I get the 12" : 1ft J£££$$$$£$p finished I will have to get back to my railway and do a bit more at it. It's in the loft and about 20 ft x 10ft with the fiddle yard underneath.
If the weather keeps warm then I hope to finish painting the J thing before I bolt on more bits. The Hippo needs a service and a bit of paint fettling ready for Poppy collecting duties. Busy busy busy. If I was at work I don't know how I would do it!
Phil