Page 2 of 70
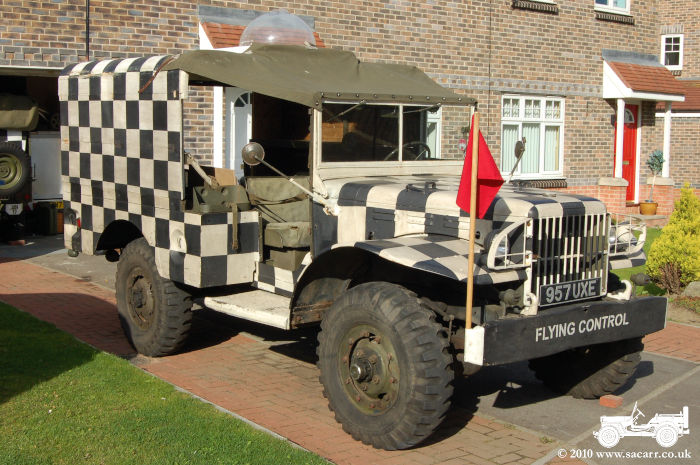
Re: My '44 Flying Control Dodge
Posted: Tue Sep 14, 2010 9:48 pm
by armyairforce
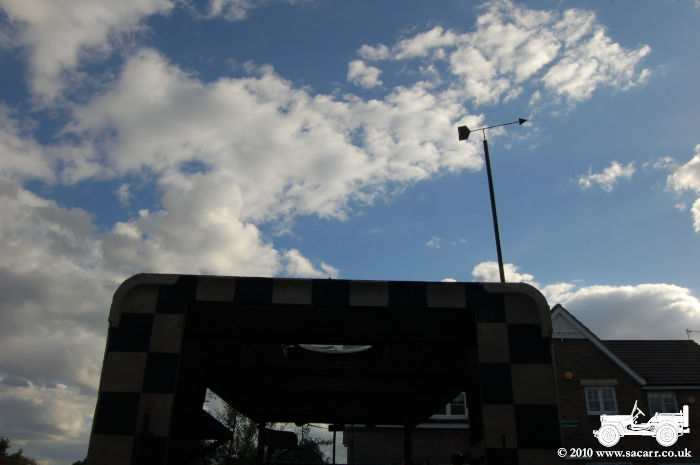
The weather vane and main support tube were primed in red oxide followed by a sprayed black top coat. The brass tube spacer has yet to be painted. The back of the arrow has been drilled for the windsock mount.

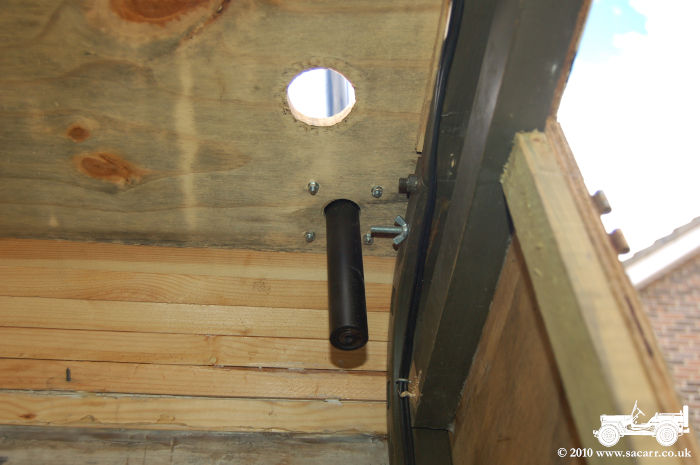
This is the ceiling mount for the weather vane mast. The flat plate will bolt to the ceiling of the truck body with the drive shaft extending down to the instrument panel.
Re: My '44 Flying Control Dodge
Posted: Fri Sep 17, 2010 8:11 pm
by armyairforce
Re: My '44 Flying Control Dodge
Posted: Sun Sep 19, 2010 4:08 pm
by armyairforce
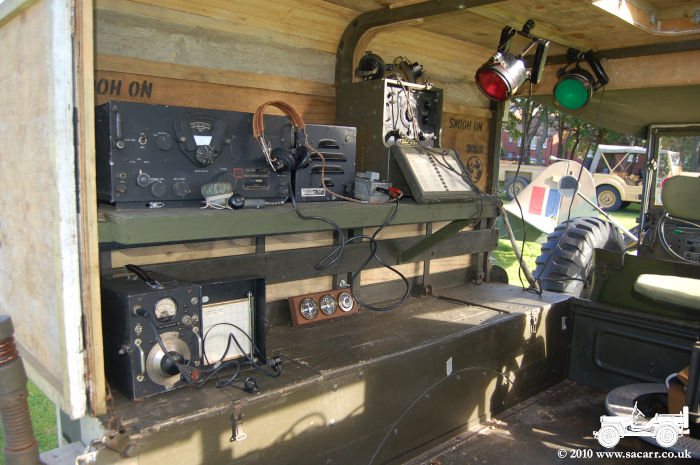
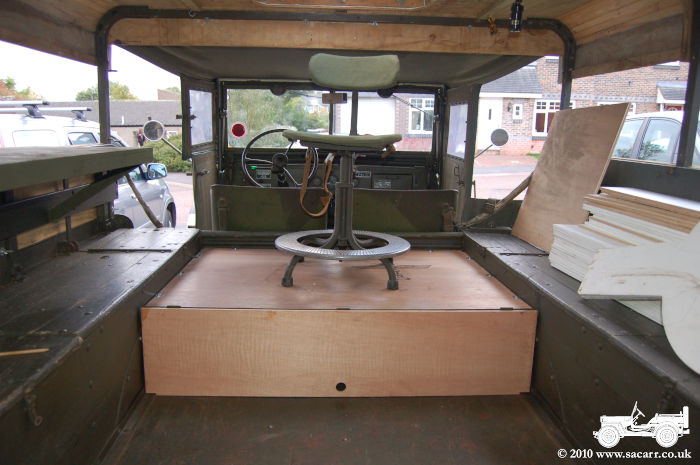
Interior
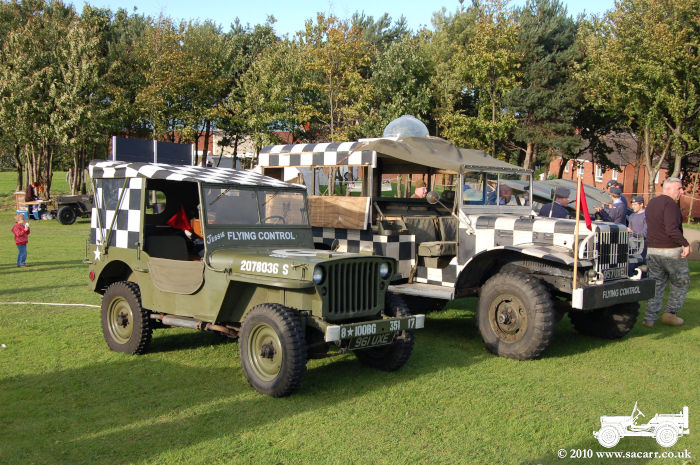
Jeep and Dodge together for the first time in my ownership.
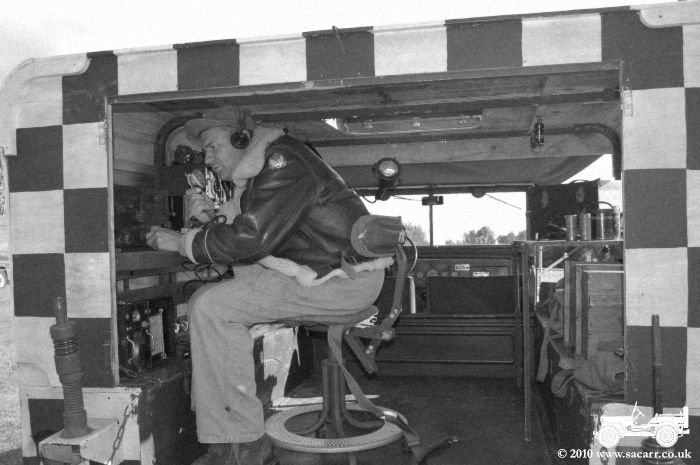
Calling in the bombers!
Re: My '44 Flying Control Dodge
Posted: Thu Sep 23, 2010 8:05 pm
by armyairforce
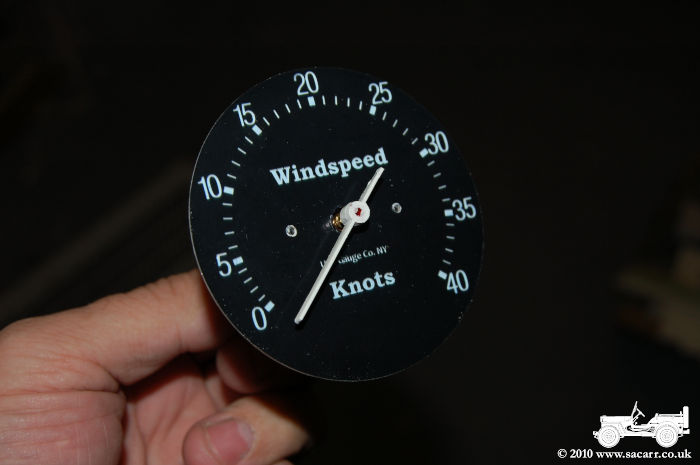
I finally got hold of a bicycle speedometer to convert into an Anemometer. The original dial was scanned, and the coloured sections and inappropriate text were removed. A new dial was then printed out and attached with double sided tape. The pointer was also resprayed white from the original red plastic. This will be installed in a panel with the other six instruments.
Re: My '44 Flying Control Dodge
Posted: Fri Sep 24, 2010 5:04 pm
by Johan WC52
Congratulations on a very cool Dodge! It's nice having something else than just a plain green vehicle.
If you ever find a photo of a chequered Dodge in WW2, post it!
Just building the top and make it detachable is a nice idea. It really changes the vehicle, and one can switch with canvas. Something for me to do next year perhaps?
/Johan
Re: My '44 Flying Control Dodge
Posted: Fri Sep 24, 2010 5:13 pm
by armyairforce
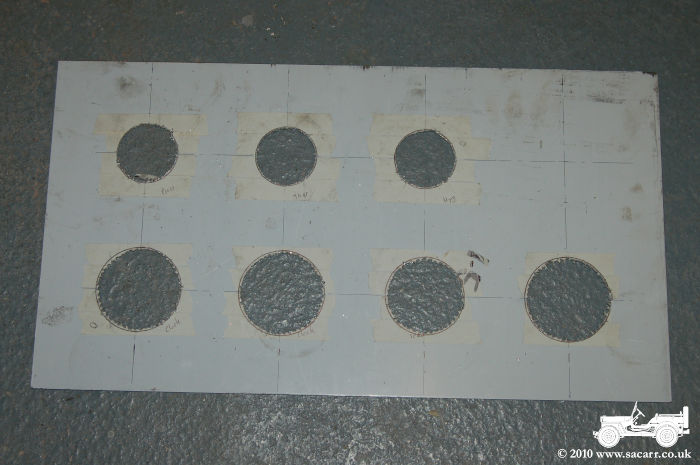
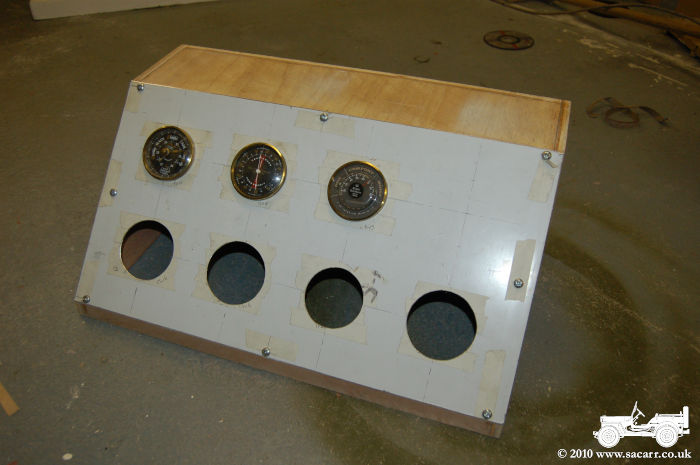
Cheers. I'm just starting work tonight cutting the instrument panel. I've got a sheet of 1.5mm aluminium for the panel, and need to cut seven holes for the instruments. Lots of chain drilling holes I think as I don't have a large enough metal hole cutter.
If a new rear body is built with uprights that drop into the bow sockets, one bolt in each could secure it and a two or three people could lift it off, making it easy to swap with the original bows and canvas.
Re: My '44 Flying Control Dodge
Posted: Sat Sep 25, 2010 9:21 pm
by armyairforce
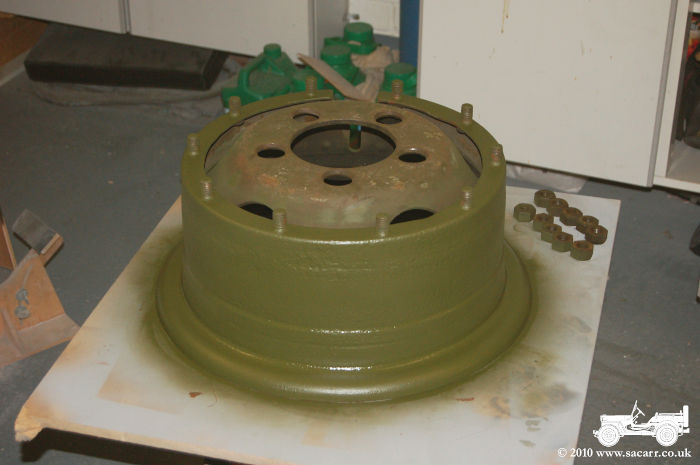
I was going to try and swap the wheels around today to find a pair that are balanced better, but discovered the spare was flat once I got started and wasn't holding air. I then discovered none of my sockets were the correct size for the split rim nuts, so had to go out and buy one and got a tube repair kit while I was on. I then struggled to break the bead for an hour before giving up and phoning the local garage who split it free of charge. I discovered the reason for the leak, the tube had split right at the valve.
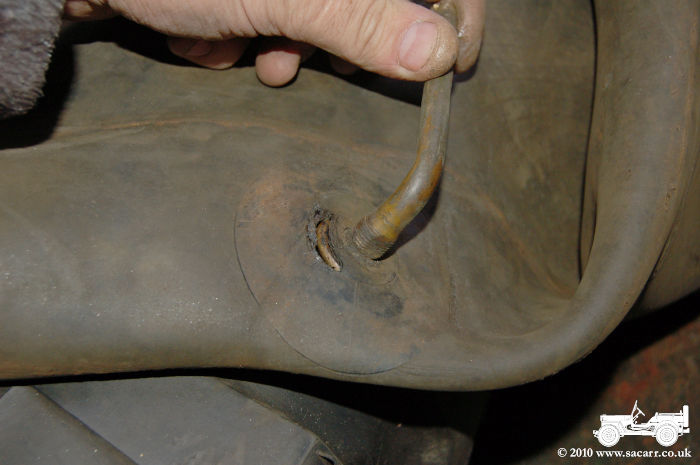
While the wheel was apart, all the loose rust was removed with a rotary wire brush, and the wheel was primed and repainted ready for when the new tube arrives.
Re: My '44 Flying Control Dodge
Posted: Sat Sep 25, 2010 9:30 pm
by armyairforce
The floor was bolted in today, and the door covering the space was cut and weather proofed. Three steel hinges were welded to the rear angle for this door to hinge on. The space to the right of the wheel under the floor is ample for the 12v battery which will probably slide into place on a tray to make access easy.
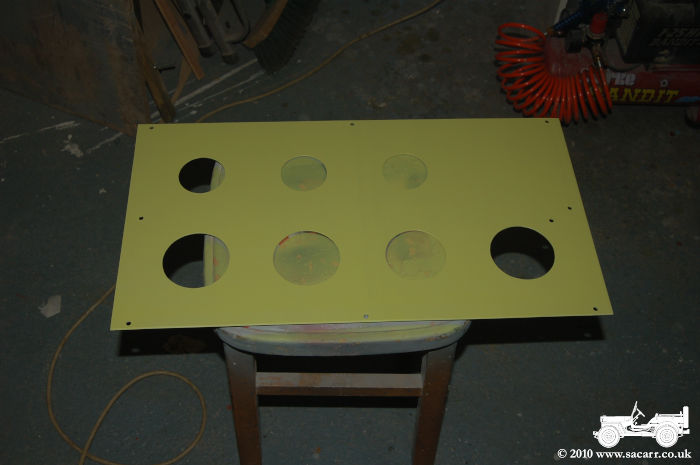
Last night I also made a start on cutting out the instrument panel. As I don't have a large adjustable hole cutter, a series of holes was drilled around the circumference of the dials, the remaining material cut out with a jigsaw. The panel now just needs filing to clean up the holes.
Re: My '44 Flying Control Dodge
Posted: Sat Sep 25, 2010 10:10 pm
by Vista52
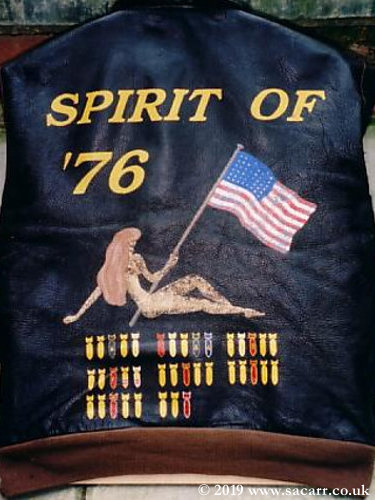
Coming along nicely, Steve. You will need to get an A-2 instead of the B-3 for Summer wear in England though!

Re: My '44 Flying Control Dodge
Posted: Sat Sep 25, 2010 10:11 pm
by armyairforce
I've got an Eastman A-2
Re: My '44 Flying Control Dodge
Posted: Sat Sep 25, 2010 10:19 pm
by Vista52
Oh, in that case, Never mind.

Re: My '44 Flying Control Dodge
Posted: Sun Oct 03, 2010 8:40 pm
by armyairforce
Further progress.
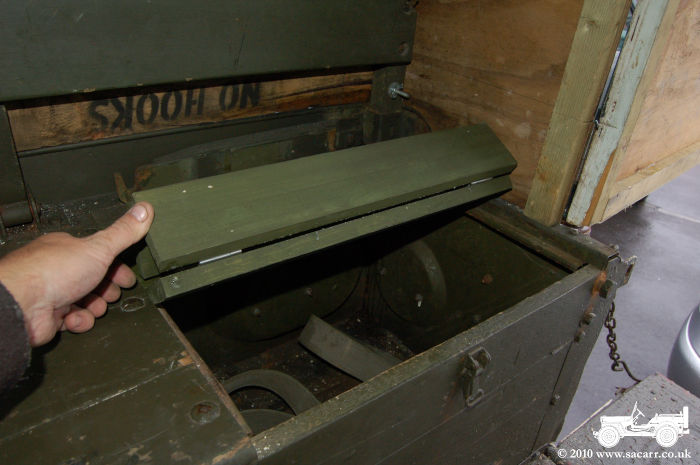
Before the Meteorological station could be built and fitted, the locker lid needed replacing. Because the table and instrument panel need to be mounted low, so as not to obstruct vision when driving, the original rear locker lid wouldn't have opened.
As a result, I've made a new lid in sections which folds back on itself, minimizing the height of the lid as it opens. While there isn't much room to reach under the table, it still allows use of the locker for smaller items. The catch from the original lid was fitted to the new lid.
Re: My '44 Flying Control Dodge
Posted: Sun Oct 03, 2010 8:40 pm
by armyairforce
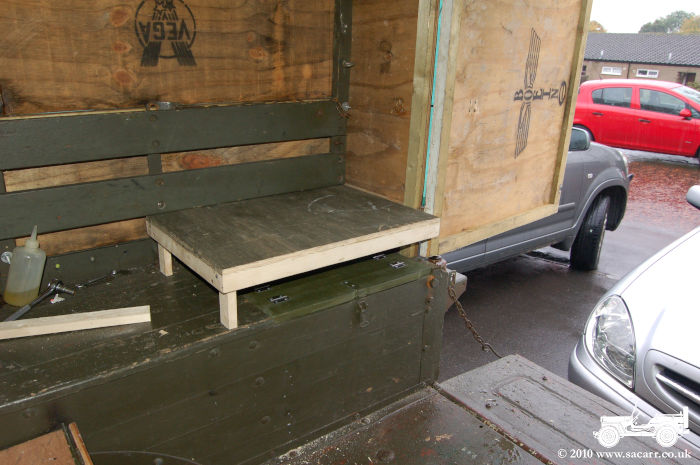
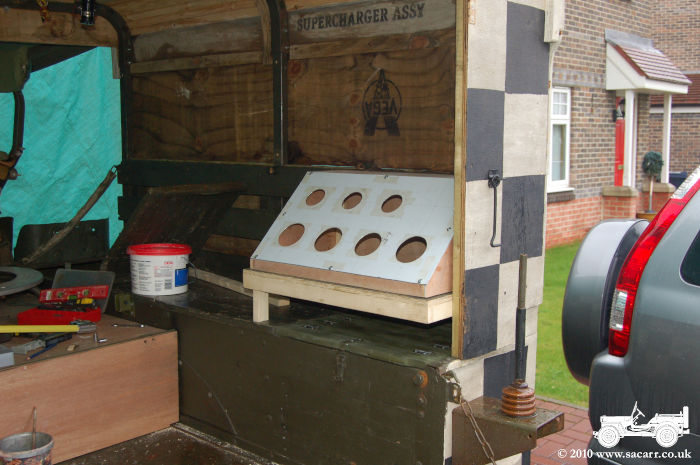
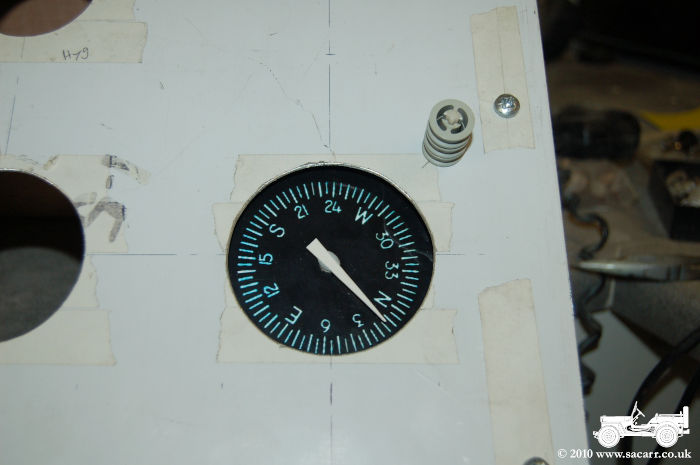
With the locker lid fitted, the table which was made yesterday, was fitted into place. This then allowed the instrument panel to be trial fitted to establish the point where the weather vane drive enters the panel. The aluminium panel was slightly over-sized, so that was filed down flush with the box.
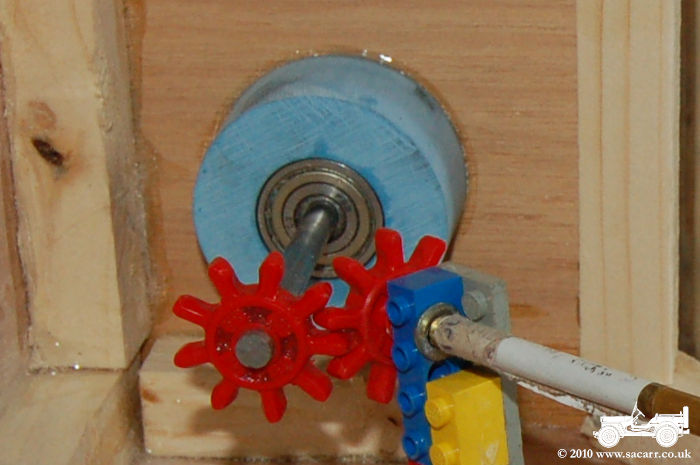
Once I knew the position where the weather vane drive goes, I began work on the wind direction indicator. The instrument needs calibrating depending on which direction the truck is parked in. Therefore, the face of the instrument can be rotated using the knob to the upper right of the dial. In the picture below, it is some plastic Lego wheels used for testing, but a turned aluminium version will be machined.
The instrument face is attached to a gear wheel, which is driven through an intermediate gear to the shaft for the adjusting knob. This gearing down allows finer adjustment of the dial position. The pointer shaft runs through the centre of the dial face gear and is seen above with a temporary styrene needle. A gear on the end of the pointer shaft will connect to the weather vane shaft via intermediate gears to make sure the direction of rotation is the same as the weather vane.
Re: My '44 Flying Control Dodge
Posted: Sat Oct 09, 2010 6:14 pm
by armyairforce
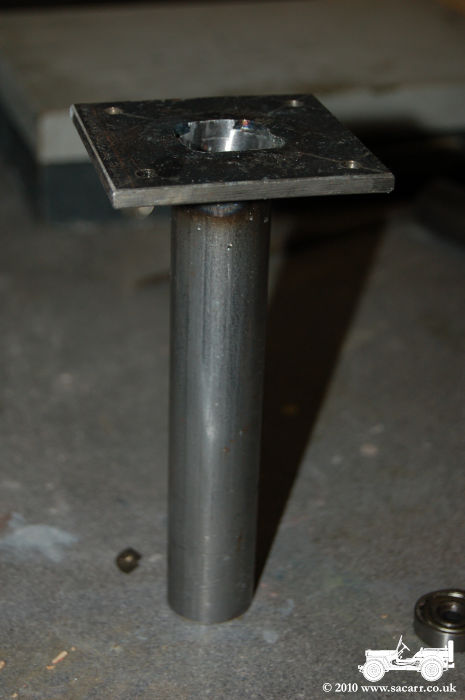
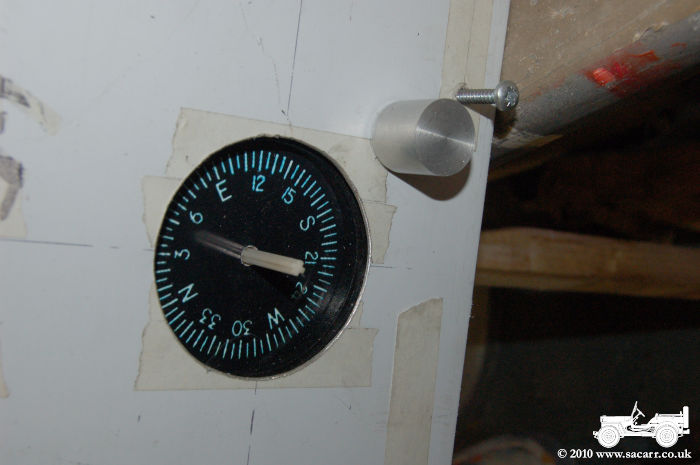
The bottom of the weather vane shaft is now supported in a bearing seated in a turned resin housing ( blue cylinder ). The gear wheel on the end of the shaft drives a second gear connected to the brass tube shaft seen below. This turns a third gear meshing with a fourth on the pointer shaft of the weather vane gauge.
Also turned up yesterday is the knob to swing the compass face to align it in the correct orientation depending how the truck is parked.
Re: My '44 Flying Control Dodge
Posted: Sat Oct 09, 2010 6:15 pm
by armyairforce
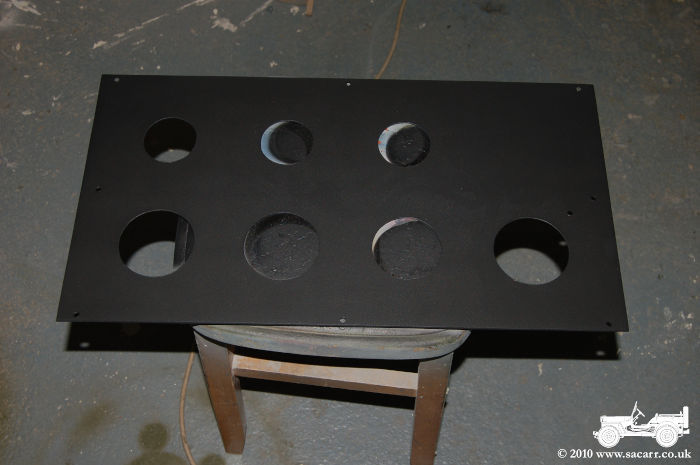
The instrument panel was also etch primed, followed by a low pressure speckle of grey primer to give the panel some teture. This was followed by a black coat and a matt coat to finish.