WC53 - Project Big Band Wagon

From VC-1 to WC64-KD.
Post Reply
User avatar
Alxj64
Sergeant
Sergeant
Posts: 134
Joined: Thu May 17, 2012 6:55 am
My garage: 1942 WC53
Location: Chesapeake, Va

Re: WC53 - Project Big Band Wagon

Post by Alxj64 »

Steve K. CALIF wrote:It will be awesome. I am still curious to see the powertrain completed and all clearances o.k. Looking good, hope the neck gets well soon so you can get serious on the project again. Thanks, Steve K.
Thanks Steve! It certainly will take a rather large "shoe-horn" to get the engine stuffed under the truck and keep a sufficient amount of ground clearance and still maintain a close to stock ride height. I have good faith it will fit based on the measurements I have taken. The tough parts are going to be getting a sufficient sized radiator, Intercooler, transmission cooler, power steering cooler, and A/C condenser all into that front grill shell.

In other fronts, err Rears... I did some more work getting the frame of the back of the body cross member built back. I did more work than this but didn't get any pictures to show for it. Hopefully later this week one evening I can get a few more pieces and parts in place and can get a slew of pictures. The sheet work is the portion that I fear currently.

Image
'42 WC53
User avatar
Alxj64
Sergeant
Sergeant
Posts: 134
Joined: Thu May 17, 2012 6:55 am
My garage: 1942 WC53
Location: Chesapeake, Va

Re: WC53 - Project Big Band Wagon

Post by Alxj64 »

Cut and broke a piece of sheetmetal last night to start covering up the frame portion of the lower gate cross member.

Image
'42 WC53
User avatar
Alxj64
Sergeant
Sergeant
Posts: 134
Joined: Thu May 17, 2012 6:55 am
My garage: 1942 WC53
Location: Chesapeake, Va

Re: WC53 - Project Big Band Wagon

Post by Alxj64 »

First piece of new sheetmetal to go back on the truck. Still need to blend in the attachment weld at the sill seam but its turning out decent I suppose. Obviously will need to trim this down and attach the radius transition for the gate corners and then blend all of that into the vertical seams... but hey... Forward progress and its a far cry from the banged up mess the truck was when I got it. I also still have to cut the openings for the hinges. Thats going to be a tedius little mess.

Image

Image

Image

Am I doing any justice to the truck yet? Or is everyone still upset with me?
'42 WC53
Steve K. CALIF
Sergeant
Sergeant
Posts: 159
Joined: Mon Jul 31, 2006 6:19 pm
Location: Madera, CA

Re: WC53 - Project Big Band Wagon

Post by Steve K. CALIF »

You and your work are awewome! Love your workl, keep it cooing! Steve K;
WC4DOOR
Sergeant
Sergeant
Posts: 152
Joined: Tue Jul 20, 2010 3:12 am
My garage: 1942 WC-53
1943 WC-53-4DOOR
1942 WC-53
And one more WC-53
Location: Salt Lake City

Re: WC53 - Project Big Band Wagon

Post by WC4DOOR »

If you access to a plasma cutter your hings holes will be a snap. If not, you can use an old wood chisel with a block of steel behind your work, with your hole pattern in a block of steel. Just clamp your block to your work, and just go slow. It does work, you just have to sharpen a little more often. How did you get your radius?
1942 WC 53
1943 WC 53 4 Door
an other 1942 WC 53
and one more WC 53
Ian Jamieson
Technical Sergeant
Technical Sergeant
Posts: 1458
Joined: Mon Jan 08, 2007 11:43 pm
Location: New Zealand

Re: WC53 - Project Big Band Wagon

Post by Ian Jamieson »

WOW, I love your work.

Do you fancy a vacation in New Zealand for a couple of weeks? I'm sure we could get you some good leisure activities lined up :wink: like repairing the rear door area of my "53 :D

Cheers

Ian
1942 WC57 Command Car
1942 WC-53 Carry-All
1941 Willys MB
User avatar
Alxj64
Sergeant
Sergeant
Posts: 134
Joined: Thu May 17, 2012 6:55 am
My garage: 1942 WC53
Location: Chesapeake, Va

Re: WC53 - Project Big Band Wagon

Post by Alxj64 »

Thanks for the compliments guys. The radius is actually 138" as I calculated it. I basically used dimensions given to me from a few guys over on the PWA site, and then ran them against the dimensions that the rear of the truck pulled back out to, and then also compared them to the lower portion of the upper hatch. I did a little math by using the arc segment formula and then used that to calculate back to my arc radius. It may not be exactly the same arc radius as the truck had originally but so far it looks just like the reference photos I have been using as guides.

And yes, I do have access to a plasma cutter, thats what I used to cut these long smooth arc pieces out. Its slowly becoming one of those tools that I am not certain I could function without it, which is kinda sad actually. I also have an oxy torch with a plethora of different tips and grew exceedingly proficient with that before I purchased the plasma cutter. Only downside to the plasma cutter I have is that they don't make drag tips for it and I have to use a stand-off guide for it to cut properly which can make things a little tedius at times. However, I am working with what I've got and not investing too much into too many new tools. I have a friend with an english wheel that I am going to go see when the time comes to finish and skin the gate.
'42 WC53
User avatar
Alxj64
Sergeant
Sergeant
Posts: 134
Joined: Thu May 17, 2012 6:55 am
My garage: 1942 WC53
Location: Chesapeake, Va

Re: WC53 - Project Big Band Wagon

Post by Alxj64 »

I've been tinkering with mine some more in the evenings after work.

Got the bottom of the cross member skin tacked.

Image

Here is a picture of the inside of the frame showing how I gusseted it as to tie the body mounts directly to the hinges to help carry load of the tailgate and minimize twisting of the body.

Image

Fitting it into place.. its rotated forward some and I still need to trim it back some to clear the radius transitions for the recess for the gate. It looks like a dent there in the middle but I think its just the light/reflection from the stuff on the shelf behind the truck.

Image
'42 WC53
User avatar
Alxj64
Sergeant
Sergeant
Posts: 134
Joined: Thu May 17, 2012 6:55 am
My garage: 1942 WC53
Location: Chesapeake, Va

Re: WC53 - Project Big Band Wagon

Post by Alxj64 »

Speaking of the gate radius transitions... I knew that they were going to be a pain to try and brake, seam, etc by hand so I went about it a different route. I took some 1/4" HR that I had floating around the shop and made a template and copied that a few times over and then plug welded them all together. I then used the outside pieces and trimmed them back a little and did the same. Two studs for an alignment, and what I don't have is the picture of the top plate that I clamped to the die to help keep the die flat. I did a few test pieces and tweaked the die set a little but for the pieces of steel that I wanted, I think this was still the cleanest and strongest way to go about making it.

Here is the stamp set. And I didn't use that hammer, I used my 20 ton Hobo-Freight shop press. Use it like once a year so it was nice to get something from it for the space it consumes.

Image

Holding it up against the back the gate frame... Going to take some trimming to get the piece of the stamp that I want but it works out because the wrinkled spot will be cut out and tossed in the "oops" pile anyways.

Image

Also, I started to line up my gate hinge locations. I had already marked for my holes on the frame, so I drilled through from the backside and attached the hinges with some long bolts. This way I can trace where I want them and then cut out the openings for them to recess into the body. Does anying think I should drill a few drain holes in the bottom of the rear gate skin? Just to keep moisture from standing inside from driving in the rain?

Image
'42 WC53
User avatar
Gordon_M
Lieutenant General
Lieutenant General
Posts: 2798
Joined: Wed Mar 08, 2006 1:43 pm
Location: Falkirk, Central Scotland
Contact:

Re: WC53 - Project Big Band Wagon

Post by Gordon_M »

A drain hole wouldn't do any harm, I assume you'll be painting it inside anyway,but because the Lift Gat overlaps in the water just runs off.

You do need hoses on the side window boxes, and longer than the originals so that they duct the water down below the double skin level. Also after priming the window boxes, use putty to form a channel along the bottom leading to the drain hose hole.
Gordon, in Scotland

( Now officially given up on any form of politics )
Steve K. CALIF
Sergeant
Sergeant
Posts: 159
Joined: Mon Jul 31, 2006 6:19 pm
Location: Madera, CA

Re: WC53 - Project Big Band Wagon

Post by Steve K. CALIF »

As always, your work continues to amaze me and it adds considerable envy of your skills. Keep it up. Can't wait to see the final results.
User avatar
Alxj64
Sergeant
Sergeant
Posts: 134
Joined: Thu May 17, 2012 6:55 am
My garage: 1942 WC53
Location: Chesapeake, Va

Re: WC53 - Project Big Band Wagon

Post by Alxj64 »

Thanks for the good words and advice everyone. The plasma cutter did an excellent job at cutting the opening for the hinges. Got the rear cross member in place for good. I want to get the rear corner radius pieces trimmed and in place and then I gotta put this project on hold for a few weeks while I get my other vehicles ready for winter, and my trail J**p ready for a long trip out of town. Yes, I stared out that "bad word" ha ha...

Image
'42 WC53
User avatar
Alxj64
Sergeant
Sergeant
Posts: 134
Joined: Thu May 17, 2012 6:55 am
My garage: 1942 WC53
Location: Chesapeake, Va

Re: WC53 - Project Big Band Wagon

Post by Alxj64 »

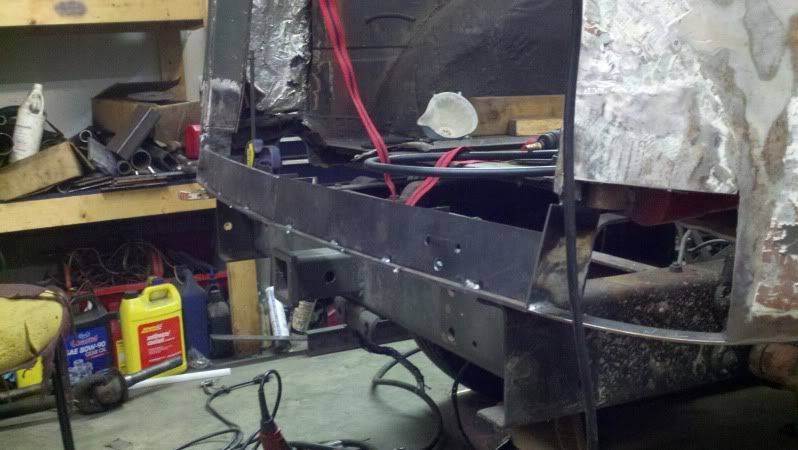
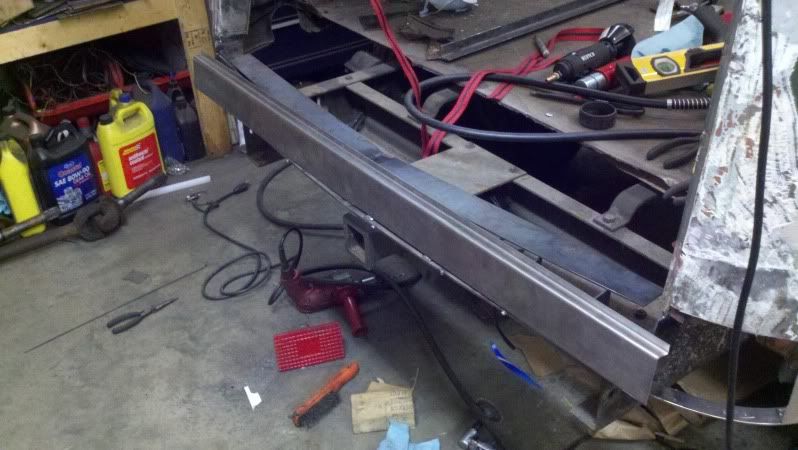
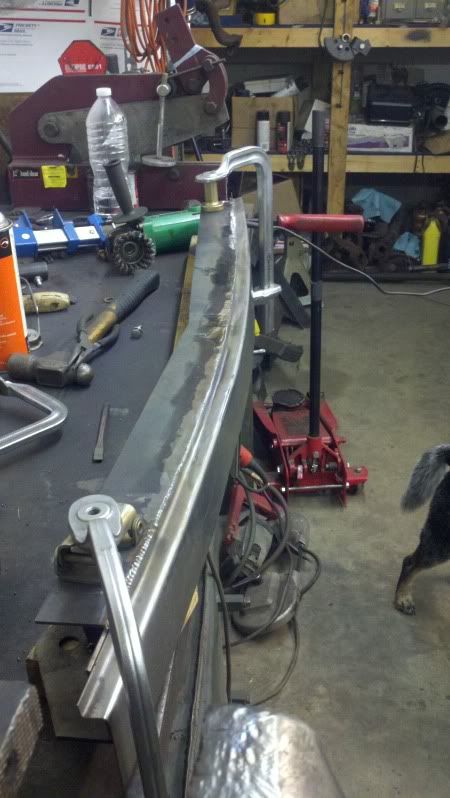
So I haven't updated anything in here for a while. Some stuff has been going on that required the space in my garage so the poor thing has been hanging out just outisde the door all wrapped up snug. Throughout the duration, I've been ironing out some details on the drivetrain. I want to have the "actual" axles, tires, and wheels under the truck when I start to shoe-horn the modernized drivetrain into the chassis.

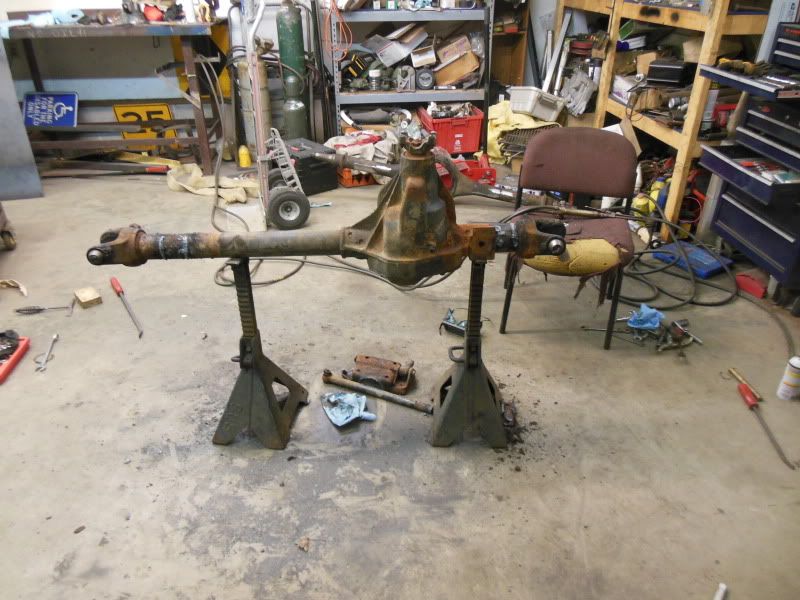
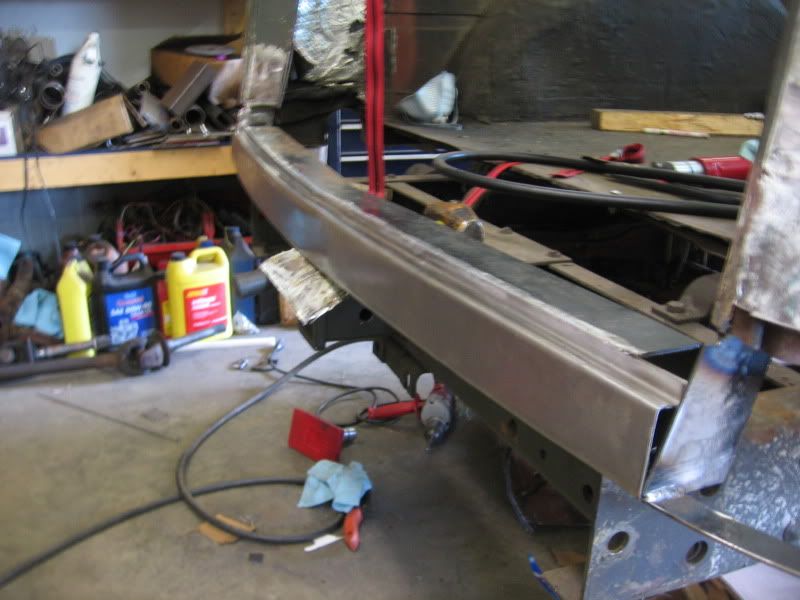
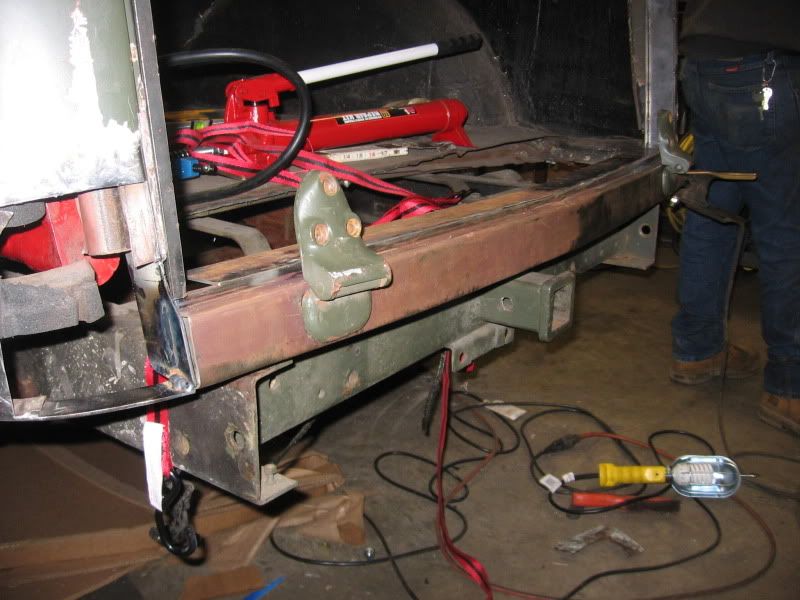
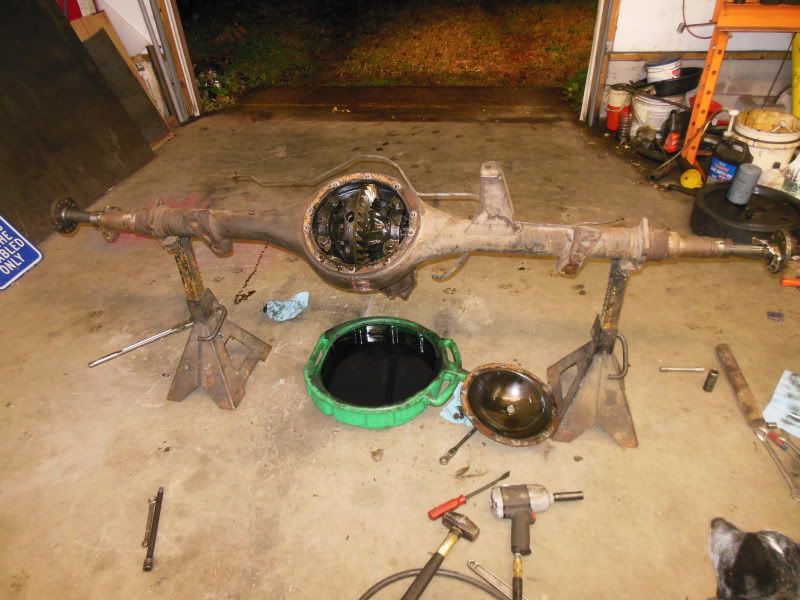
The new drivetrain is using driver's side front differential for clearance issues. With the Cummins Turbo and the large diameter exhaust occupying a decent amount of space on the passenger's side; sneaking that past a girthy Allison transmission and wide New Process transfer case would be difficult and inefficient use of undercarriage space so I opted to move the driveshaft output to the driver's side and in doing so am running a Divorced NP205. The original choice of front axle, which I had already procured was a Dana 60 King Pin, dually, from an '86 or '87 F-350. Super strong axle, high pinion gearset, beefy half wall tubes, and the common 8 on 6.5 wheel pattern. However, the spring spacing on the WC is 30.75" as I measured it on this exact truck... The pad spacing on the Dana 60 is 36.5"... So WAY off... Additionally the driver's side perch is part of the casting and there is a very short tube on the driver's side with differential very close to the frame and the overall WMS-WMS of the front axle is 69.25" which is way wider than the rear axle. I'll address the solutions to these problems after outlining the rear axle and its role in the front axle...

As for the rear axle, all is still well. I am using an Eaton HO72 rear from a '68 GM Suburban. It is 65" WMS-WMS (wheel mounting surface), so its not terribly wide and will allow the selection of various different wheels. So, this rear axle has a similar appearance to the axles currently under the dodge. Granted it has a round cover, its still the 3rd member style rear, with the steel tapered housings... and if you are familiar is a smaller version of the axles found under the GM 2.5 tons of the same Era. I have a couple of these axles around because they are super stout, I like old stuff thats been proven to work, and they are just cool.

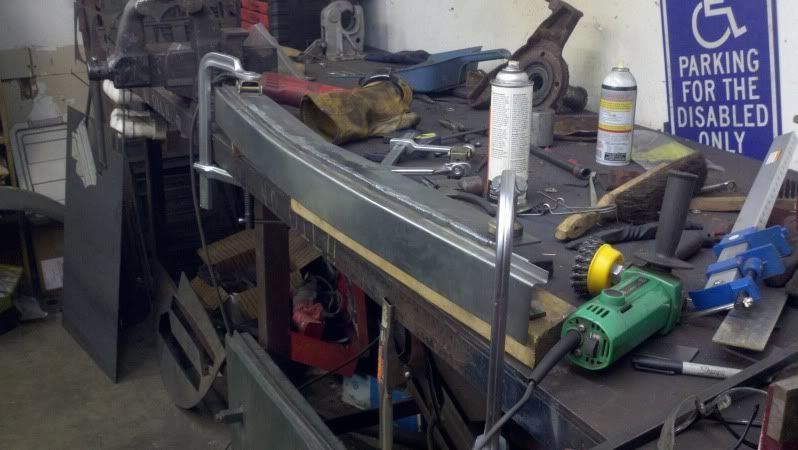
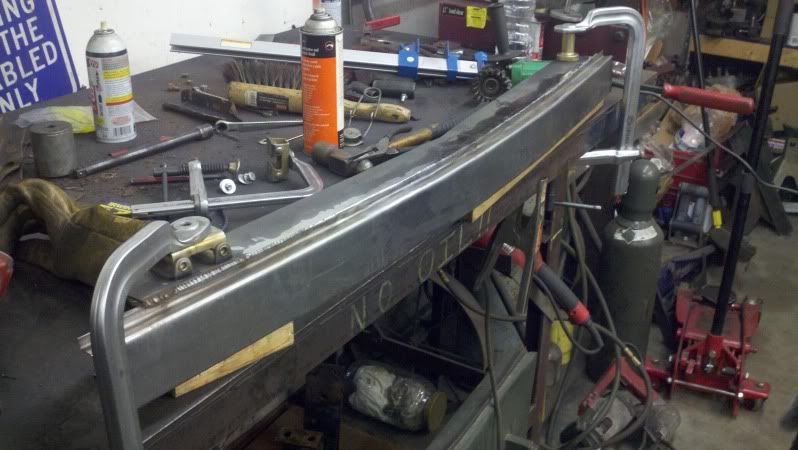
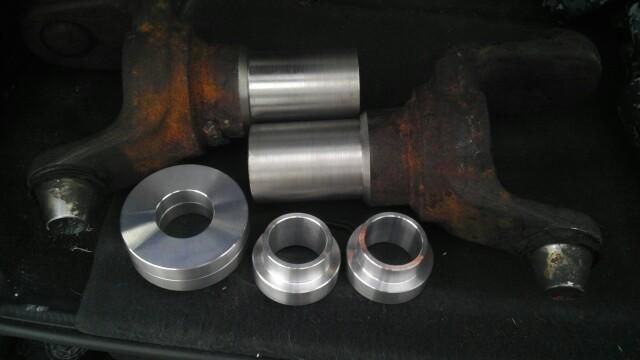
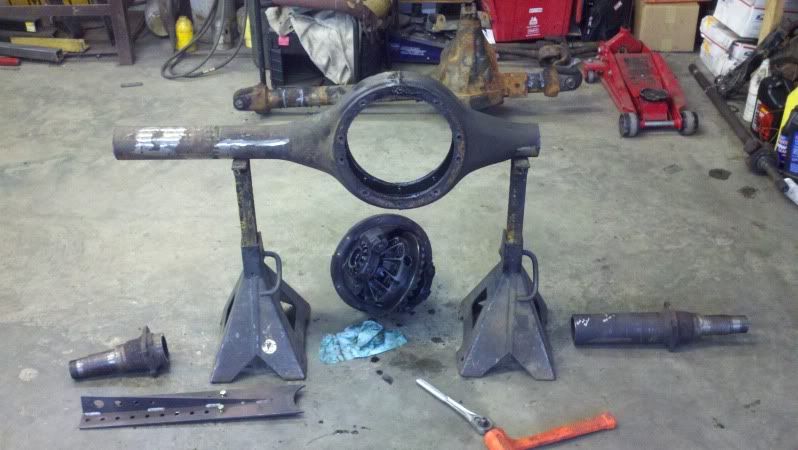
So, as I stand there staring at this "modern" looking front axle next to my vintage looking rear axle.. It dawns on me; I was going to have to pull the tubes from the Dana 60, shorten one side, extend the other side, reassemble it, and have custom inner axle shafts made just to get the spring perch spacing to work, and was still going to end up with a modern appearing axle that is identical to the one under my trail J**p. The gears start turning and the smoke starts billowing and I start cutting things. I decided what I can do, is build the front axle out of the two axles, and keep my vintage appearance (aside from the closed knuckle) acheive the correct spring perch spacing, yield an even stronger axle than the Dana 60, and in the end not have spent anymore money or time for that matter....

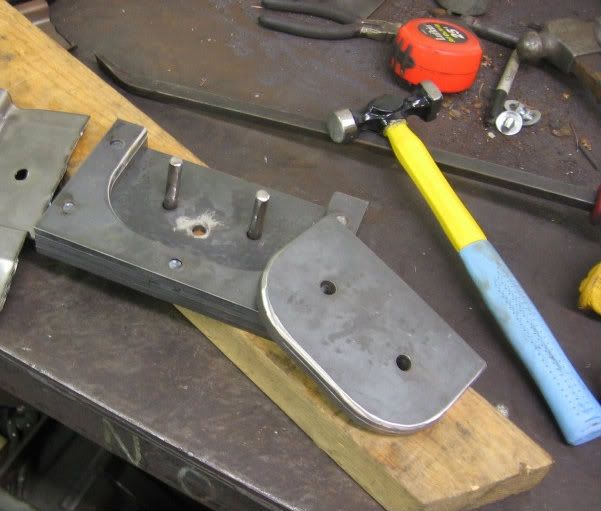
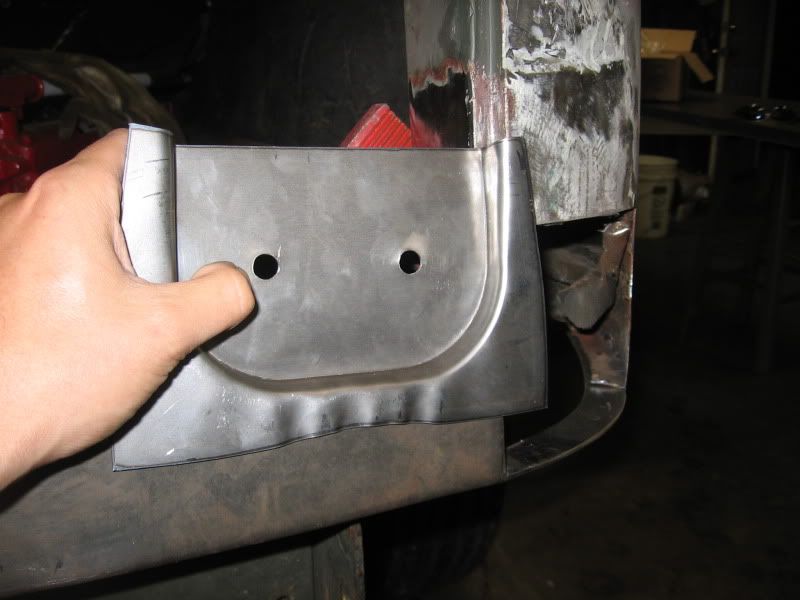
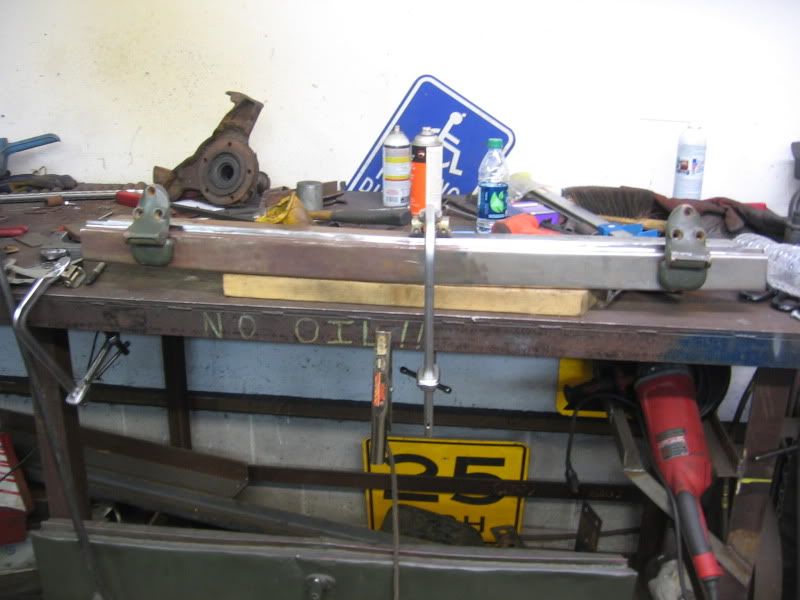
So, here is where I am so far with the building of my "resto-mod" custom front axle.

Donor front housing...
Image

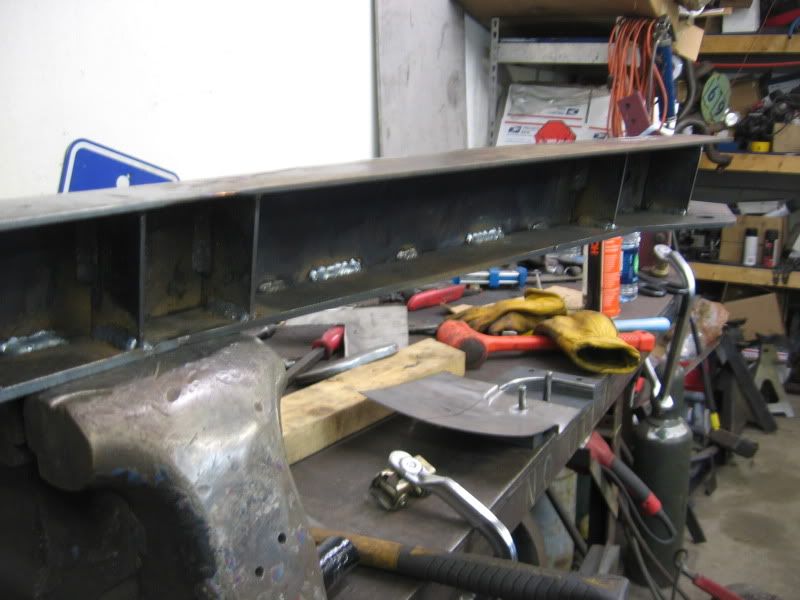
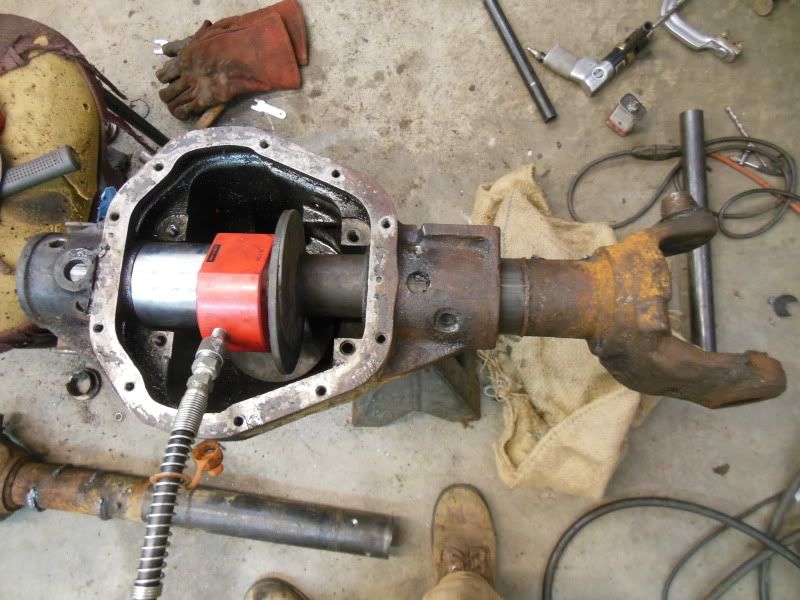
Rear HO72, cut down and spindles cut off.
Image

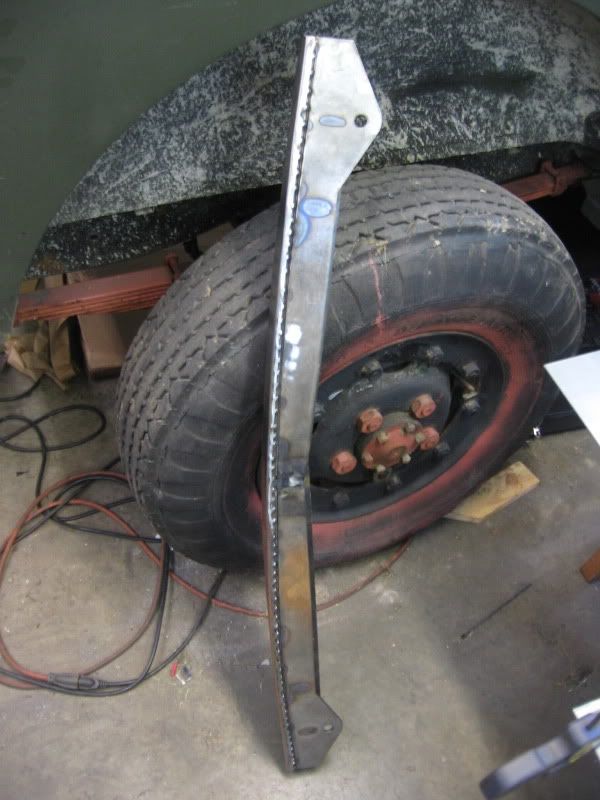
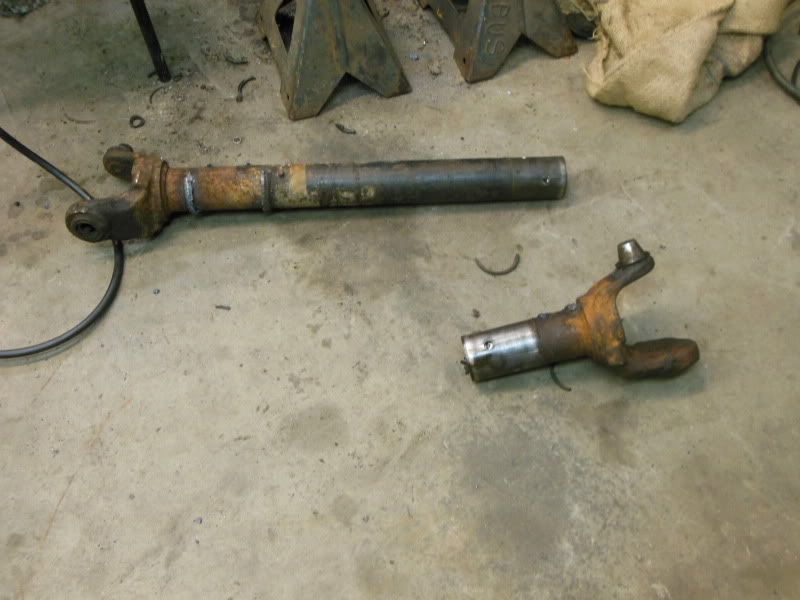
Dana 60 Front Donor Axle
Image
'42 WC53
User avatar
Alxj64
Sergeant
Sergeant
Posts: 134
Joined: Thu May 17, 2012 6:55 am
My garage: 1942 WC53
Location: Chesapeake, Va

Re: WC53 - Project Big Band Wagon

Post by Alxj64 »

Few more pictures...

Removing tubes from the Dana 60.
Image

Image

And then had the tube ends turned down, and a set of alignment pucks machined from Aluminum to hold everything true and straight for welding the axle back together. I can also pick my own caster angle and pre-set my pinion angle to make the truck drive better too.
Image

This is currently where I stand with the front axle portion of the project. Will be grabbing the alignment bar which is a piece of 1.75" dia stainless ground solid stock and hopefully be able to setup and weld the axle together after Christmas. After that I plan to roll the whole truck back in the shop and swap the axles out and also finish up the rear body work and tailgate.
'42 WC53
Steve K. CALIF
Sergeant
Sergeant
Posts: 159
Joined: Mon Jul 31, 2006 6:19 pm
Location: Madera, CA

Re: WC53 - Project Big Band Wagon

Post by Steve K. CALIF »

It is always interesting to see your work. Your truck will sure be nice...too nice to use?
There have been some really nice and neat diesel conversions done over at the Power Wagon site, does any of their expertise help you in figuring things out?
With your skills and knowledge, have you found a possible way to end up using the original 5 lug wheel and axle bolt spacing?
Please keep posting pictures, etc. as this is one of the more interesting topics to follow! Steve K.
Post Reply